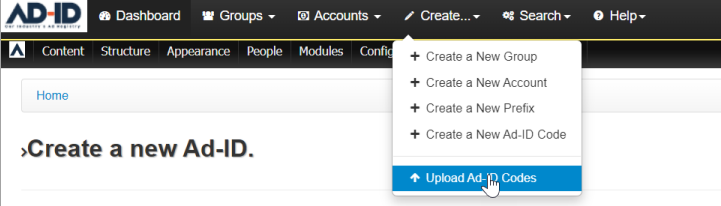
1. Click on the Create menu and select Upload Ad-ID Codes.
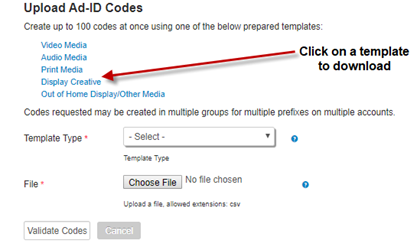
2. Click on the template to download the Excel file.
The Ad-ID templates must be used for the upload to work.
3. Fill in the required fields on the spreadsheet (marked with red asterisk).
Create up to 100 codes.
Each row completed in the spreadsheet will create a new code.

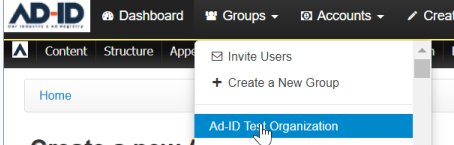
4. Enter the Group ID (do not use the group name).
Finding the Group ID: Go to the group. ID is in the URL.

5. Enter the prefix. 
6. Enter the Account ID (do not use the account name).
Finding the Account ID: Go to the account. ID is in the URL.


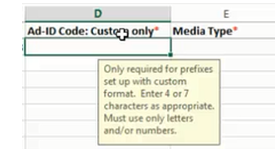
7. Ad-ID Code is only required when using a Custom prefix.
If not using a custom prefix, leave this field blank.
If using a Custom 4 prefix, enter 4 alpha-numeric characters.
If using a Custom 7 prefix, enter 7 alpha-numeric characters.
For Custom 7, if the same code is used in more than one row, you will receive an error when uploaded.
DO NOT ENTER THE PREFIX IN THIS COLUMN.
8. Select Media Type and Medium. 
9. For the Video template only, select Yes for each format (SD, HD, 3D) needed.
You must mark at least one format as Yes.
To create matching SD/HD/3D codes, use only one row. Select Yes under each column in that row.
10. Select the Code Record Type.
You may leave this blank and it will default to Original.
Parent Record and Derivative Type should only be used if Derivative is the Code Record Type.

11. Enter Brand and Product if not assigned to the prefix.
Parent and Advertiser can be left blank. The parent and advertiser assigned to the prefix will be used.
If there is a Brand and/or Product assigned to the prefix, those do not need to be filled out.
The value in the spreadsheet will be ignored if already assigned to the prefix.
View prefix on the Ad-ID system (from Dashboard) to determine fields assigned to the prefix.
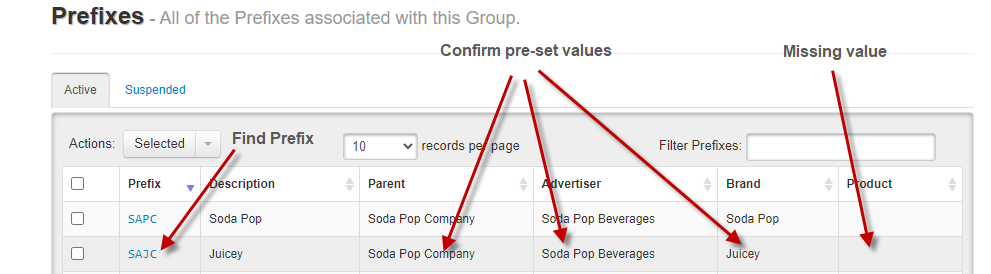
Enter missing values in spreadsheet.

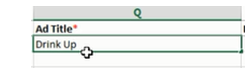
12. Enter the Ad Title.
13. Choose a Length or Size.
Choose from the standard lists of lengths/sizes (in seconds for Video and Audio).
If Other is selected, enter numbers and/or decimals (e.g., 8.5) in Length Other column.
If Tagged is selected, enter numbers and/or slashes (e.g., 27/36) in Length Other column.
14. Choose a Language and enter agency name.
Both may be left blank.
Language will default to English.
Agency Name will default to the company name in the user profile of the user uploading the file.
If Agency Name is entered in spreadsheet, that value will be used instead of user profile company.

15. Complete other optional fields as needed.
When entering dates, use format: YYYMMDD

16. Save as a Comma Separated Value (CSV). Go to File and choose Save As.
We recommend also saving the Excel version.
Edits should be done within the Excel version. The CSV may not work properly when editing.
For MAC, save as Windows Comma Separated file (MS DOS) not Comma Separated Value (.csv).
The images below may look different based on the version of Excel and MAC or PC.

17. Select where to save the file and rename if wanted. 
18. In Save As Type, select CSV. Then hit Save. 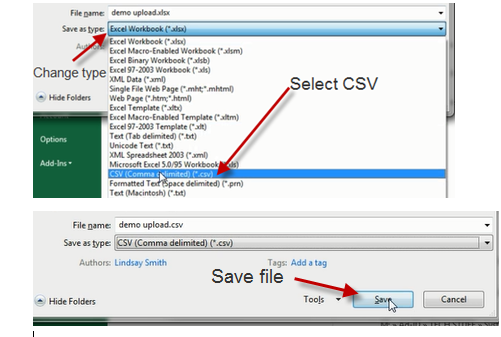
19. If you see the following messages, click OK or Yes, then file will be saved.
20. When closing the file, you may see the message below. Select Don't Save.
If custom codes begin with zeros (e.g., 0006834), the zeros will not show in the CSV file.
When the file is uploaded, the codes will be correct.

21. Click on the Create menu and select Upload Ad-ID Codes.

22. Select the template to be uploaded.

23. Click browse and find the file you saved.

24. The file selected will be displayed. Click on Validate Codes.
This step only verifies the data is correct. It does not create the codes.
Any errors will be displayed with a red message.
Errors will reference the line within the spreadsheet.
Error example: Error on line 4 means 4th row of data, which would be row 5 of the spreadsheet. 
25. Order summary shows details, including the cost.
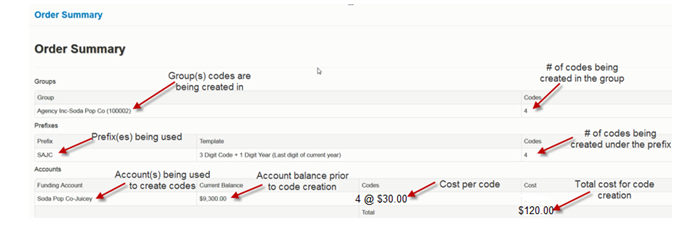
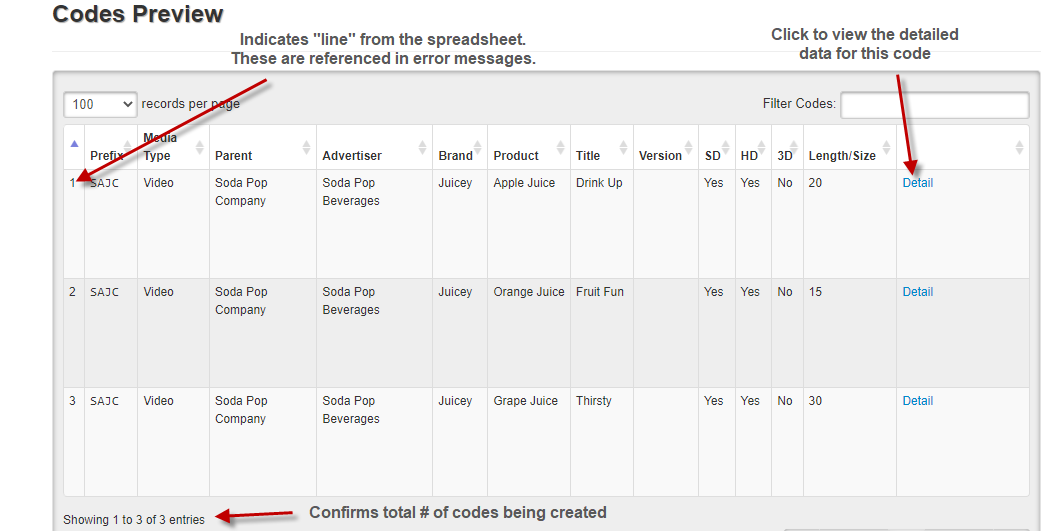
26. Codes Preview shows a summary of data entered.
Codes are not displayed. They have not been created yet.
Click on Detail link to view more information.
27. After confirming information, click on Submit Purchase.
User must review information to make sure it is correct, including cost, before submitting.
If information is incorrect, click on the Back button or navigate away from the screen.
